Manual H&E alignment
Before you begin
Before start, make sure that you have installed spacemake as specified here
For the manual allignment we will use Fiji, an open-source image processing tool. Download it from here.
We will be using tile nr 2105 from Seq-scope for this tutorial. The corresponding H&E image is wt_4X_2.jpg.
Step 1 - generate an expression image
First using the command line we generate an aggregated expression image. In the directory of your spacemake project, type:
spacemake spatial create_aggregated_expression_img \
    --project_id seq_scope \
    --sample_id seq_scope_liver_2105 \
    --run_mode seq_scope \
    --processed_data False \
    --binary True \
    --out_img aggregated_seq_scope_2105_img_bw.png
This will generate a black and white image based on expression data.
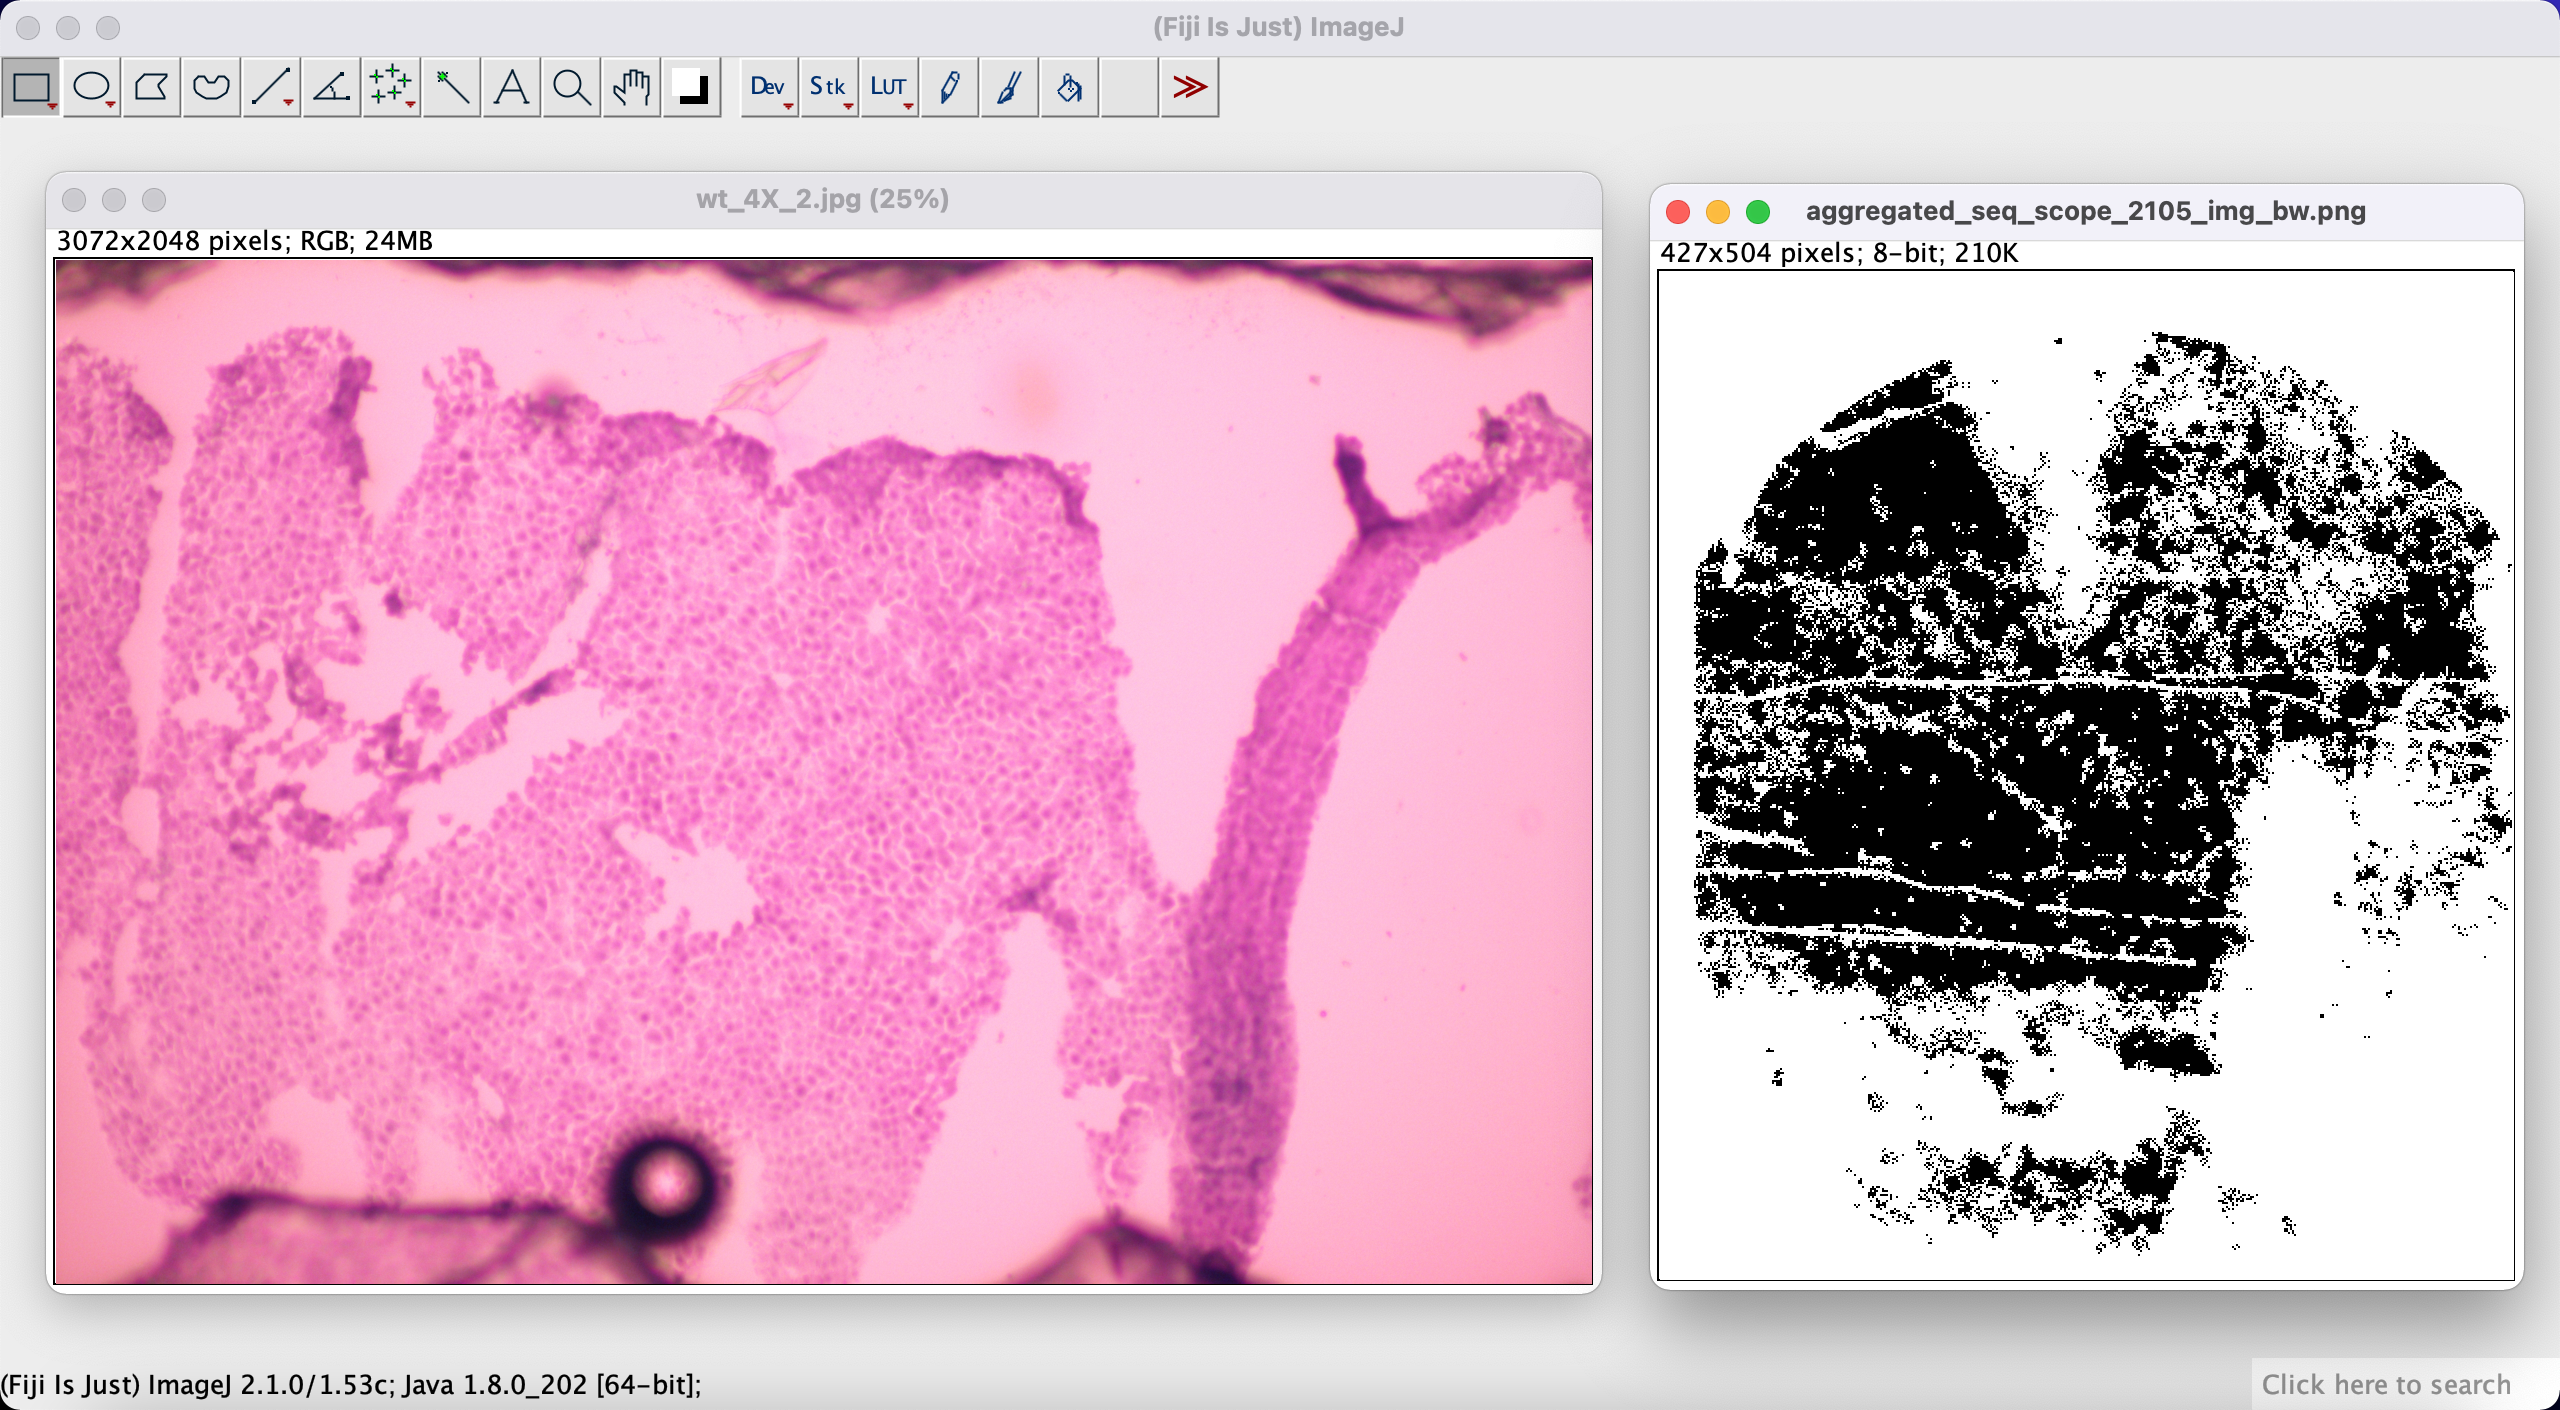
Step 2 - load images into Fiji
In the next step we load both images into Fiji like below:
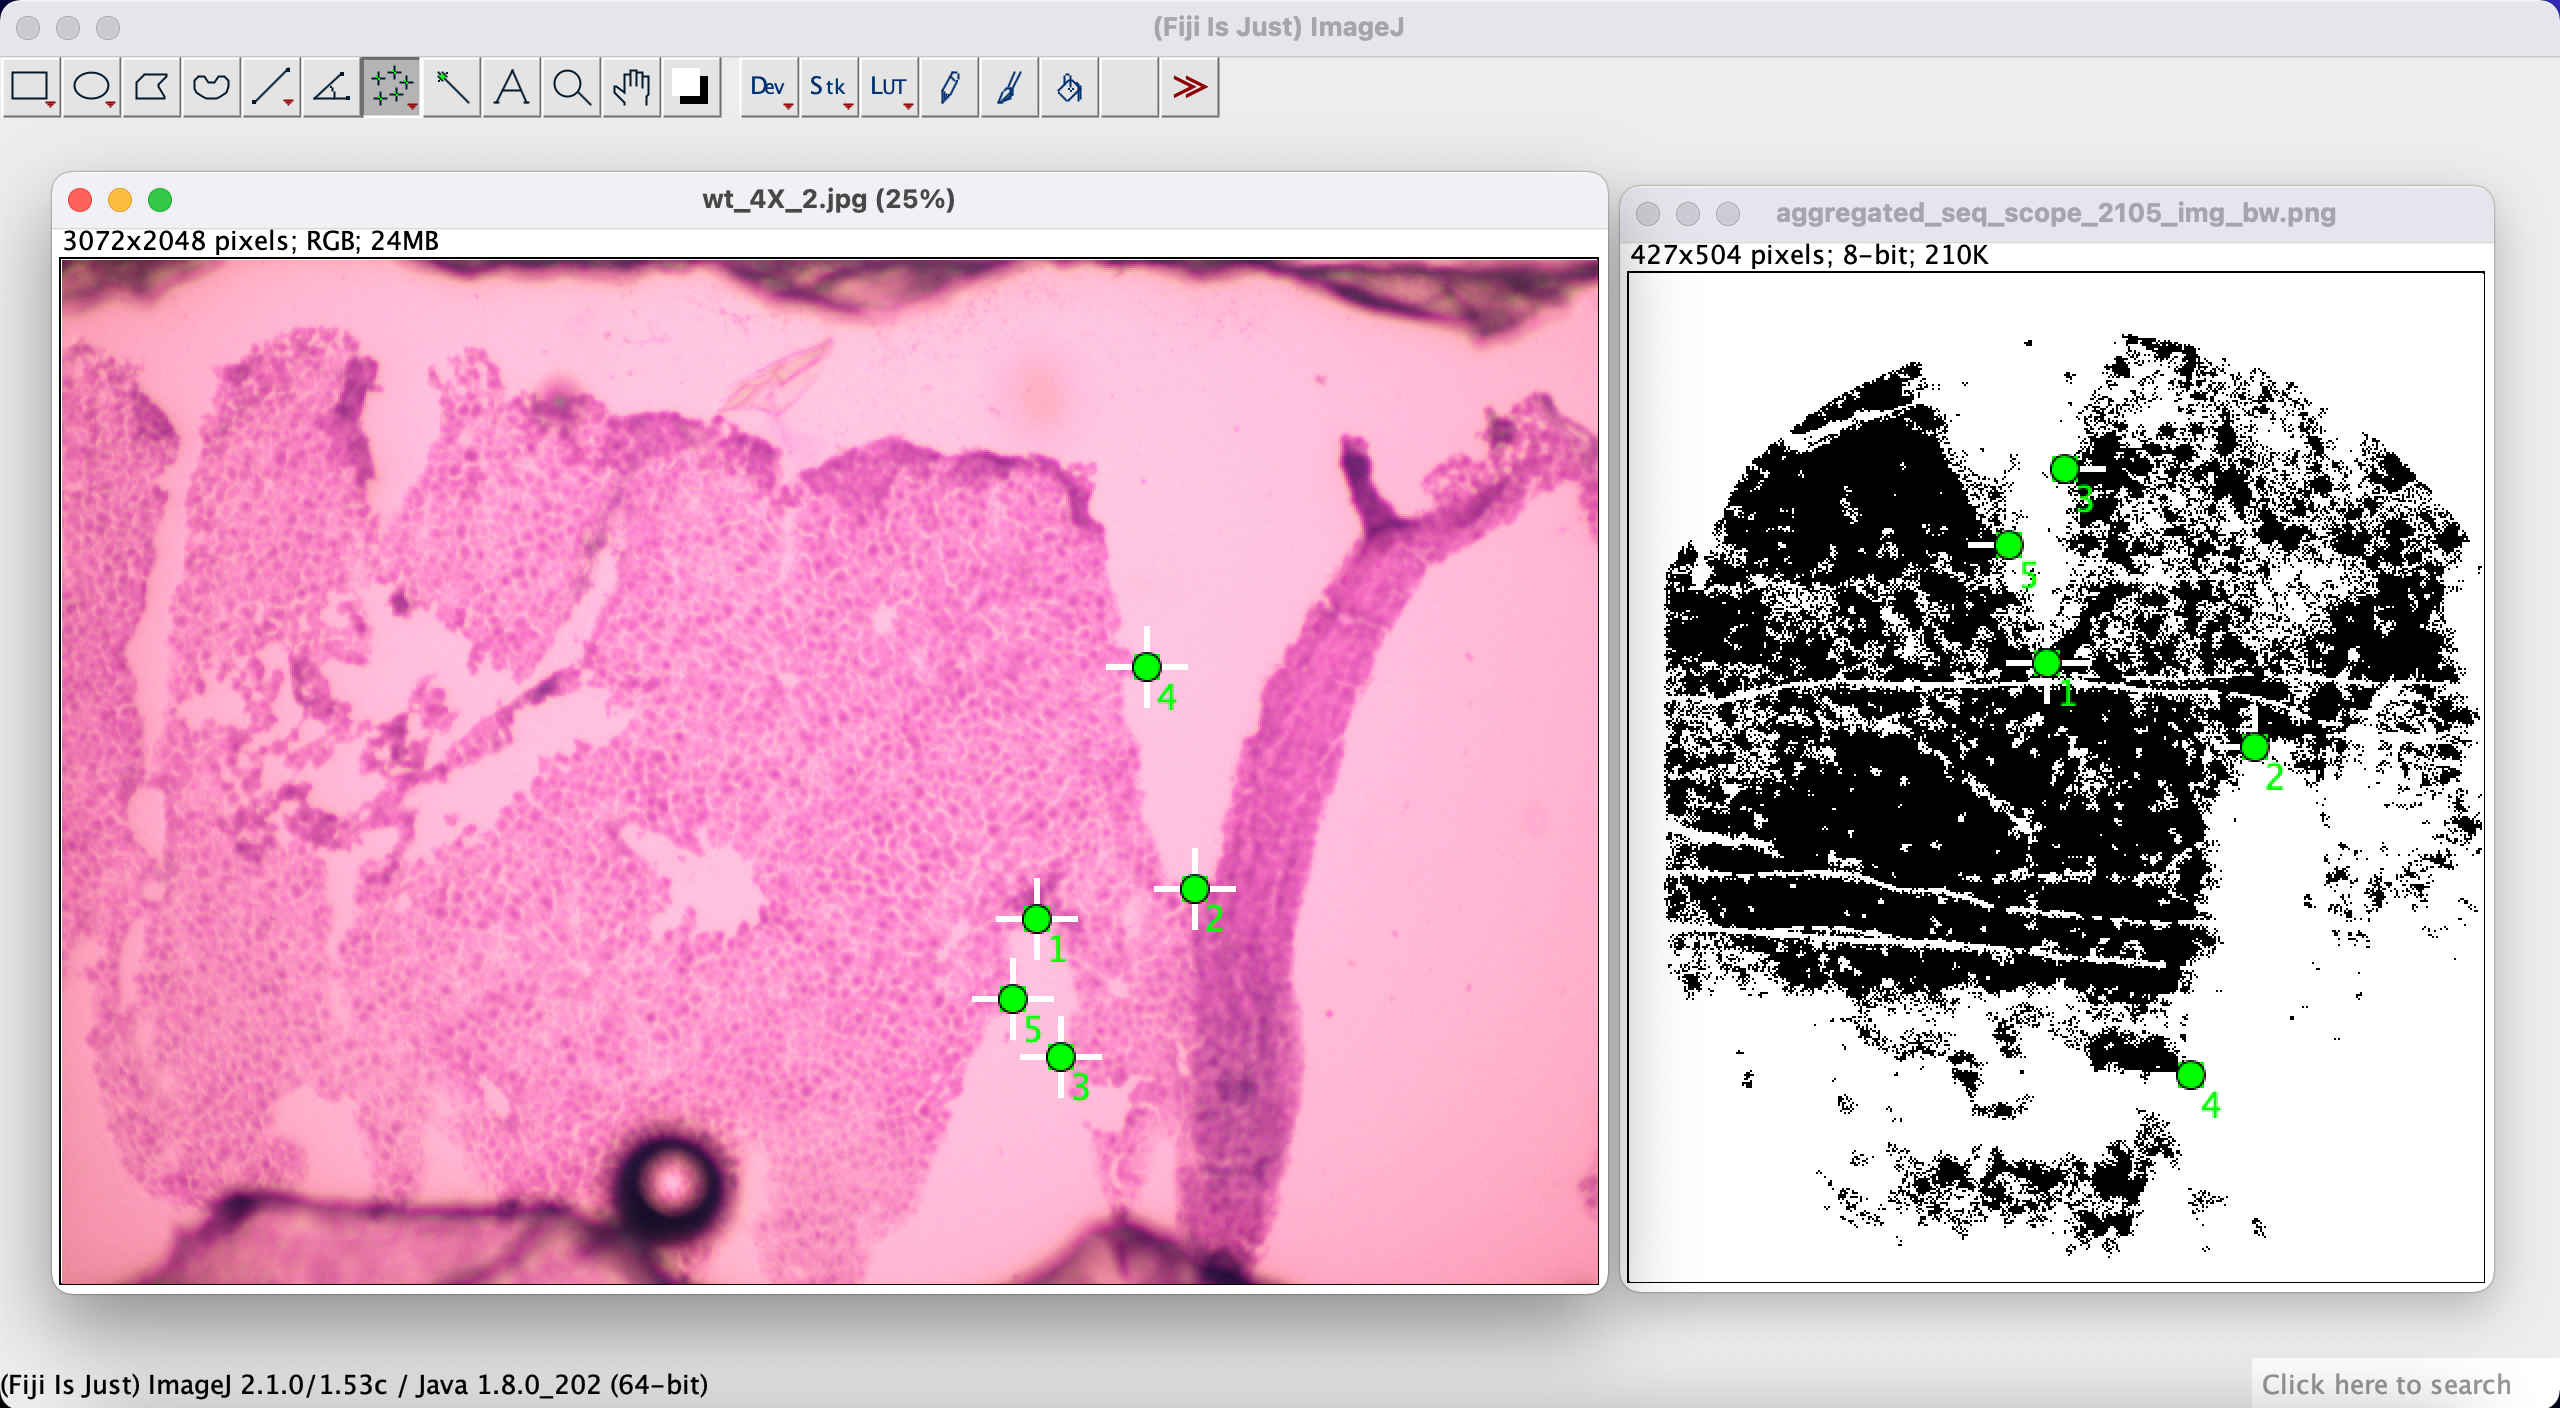
Step 3 - select corresponding points
Next, using the Multi-point Tool we manually select corresponding points between our expression image and the H&E image. Select a point on one of the images, and then select a corresponding point on the other image. Do this for at least 4-5 corresponding points for a better match.
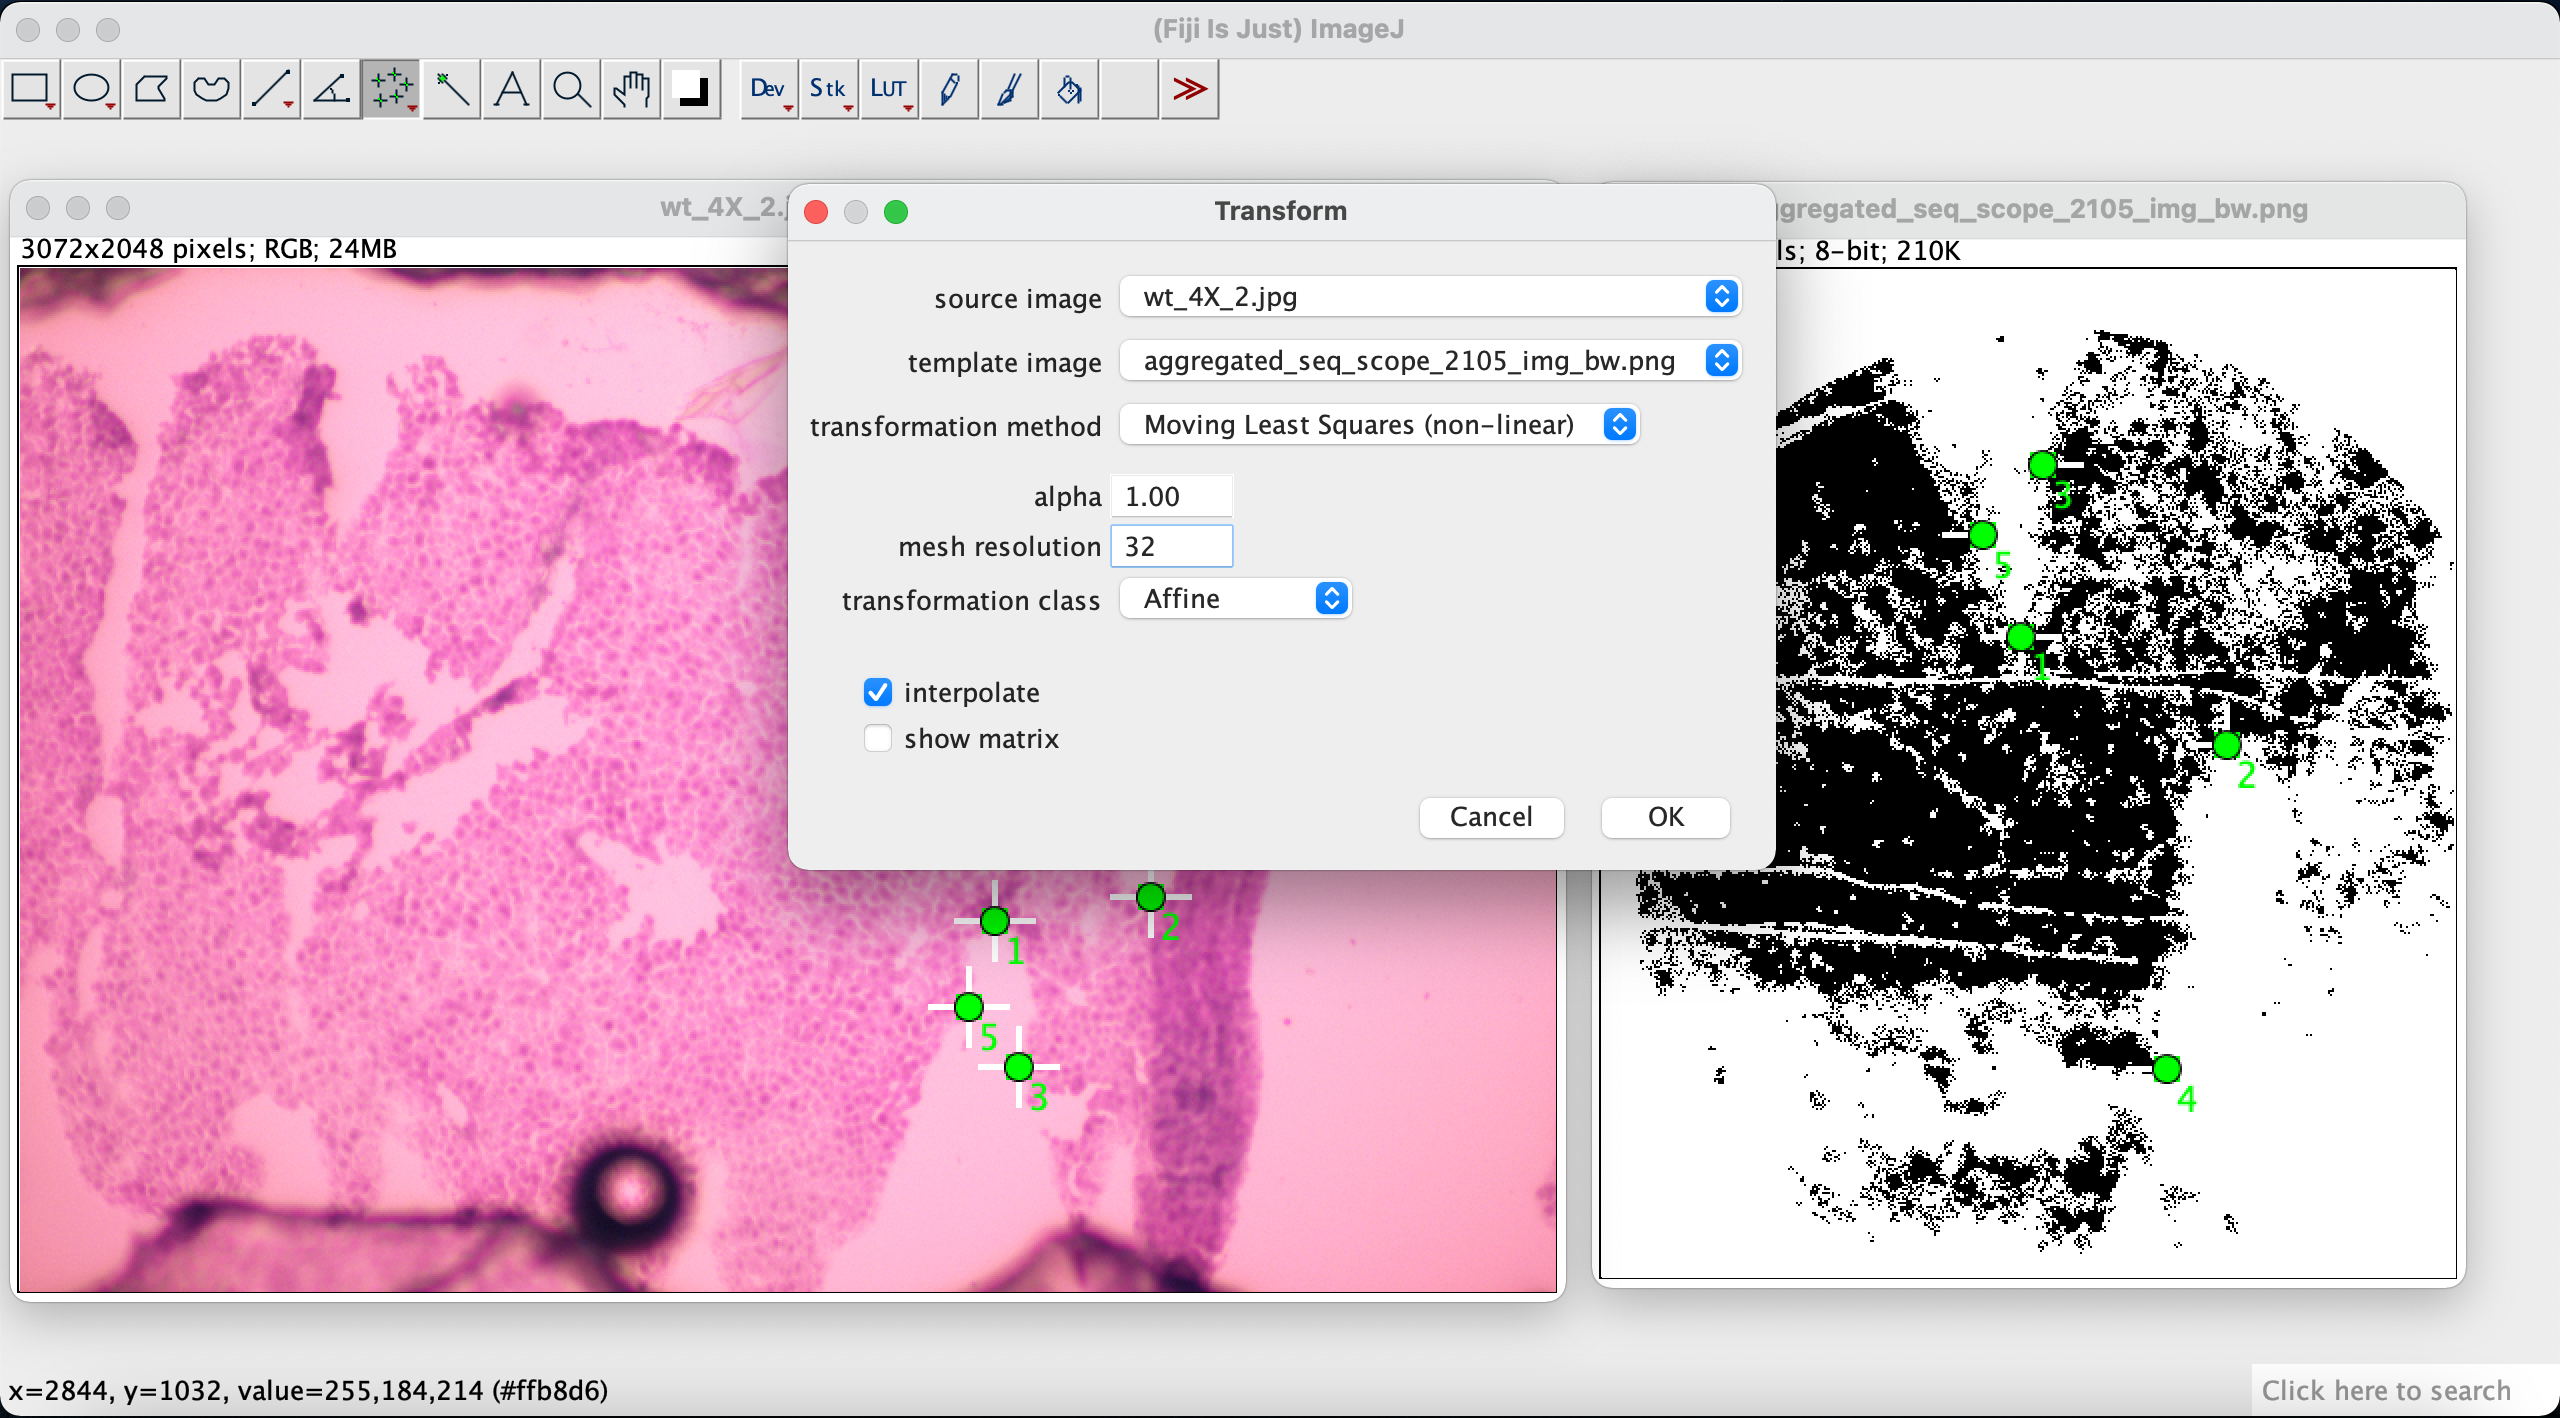
Step 4 - align the images
We then use the Landmark Correspondences plugin to align the two images based on the correspondencing points we selected in the previous step. We go to Plugins -> Transform -> Landmark Correspondences:

In the pop-up window we select H&E image as the source image and expression image as the template image. For the transformation method select Moving Least Squares (non-linear). Set the alpha to 1.00 and the mesh resolution to 32. Set the transformation class to Affine.
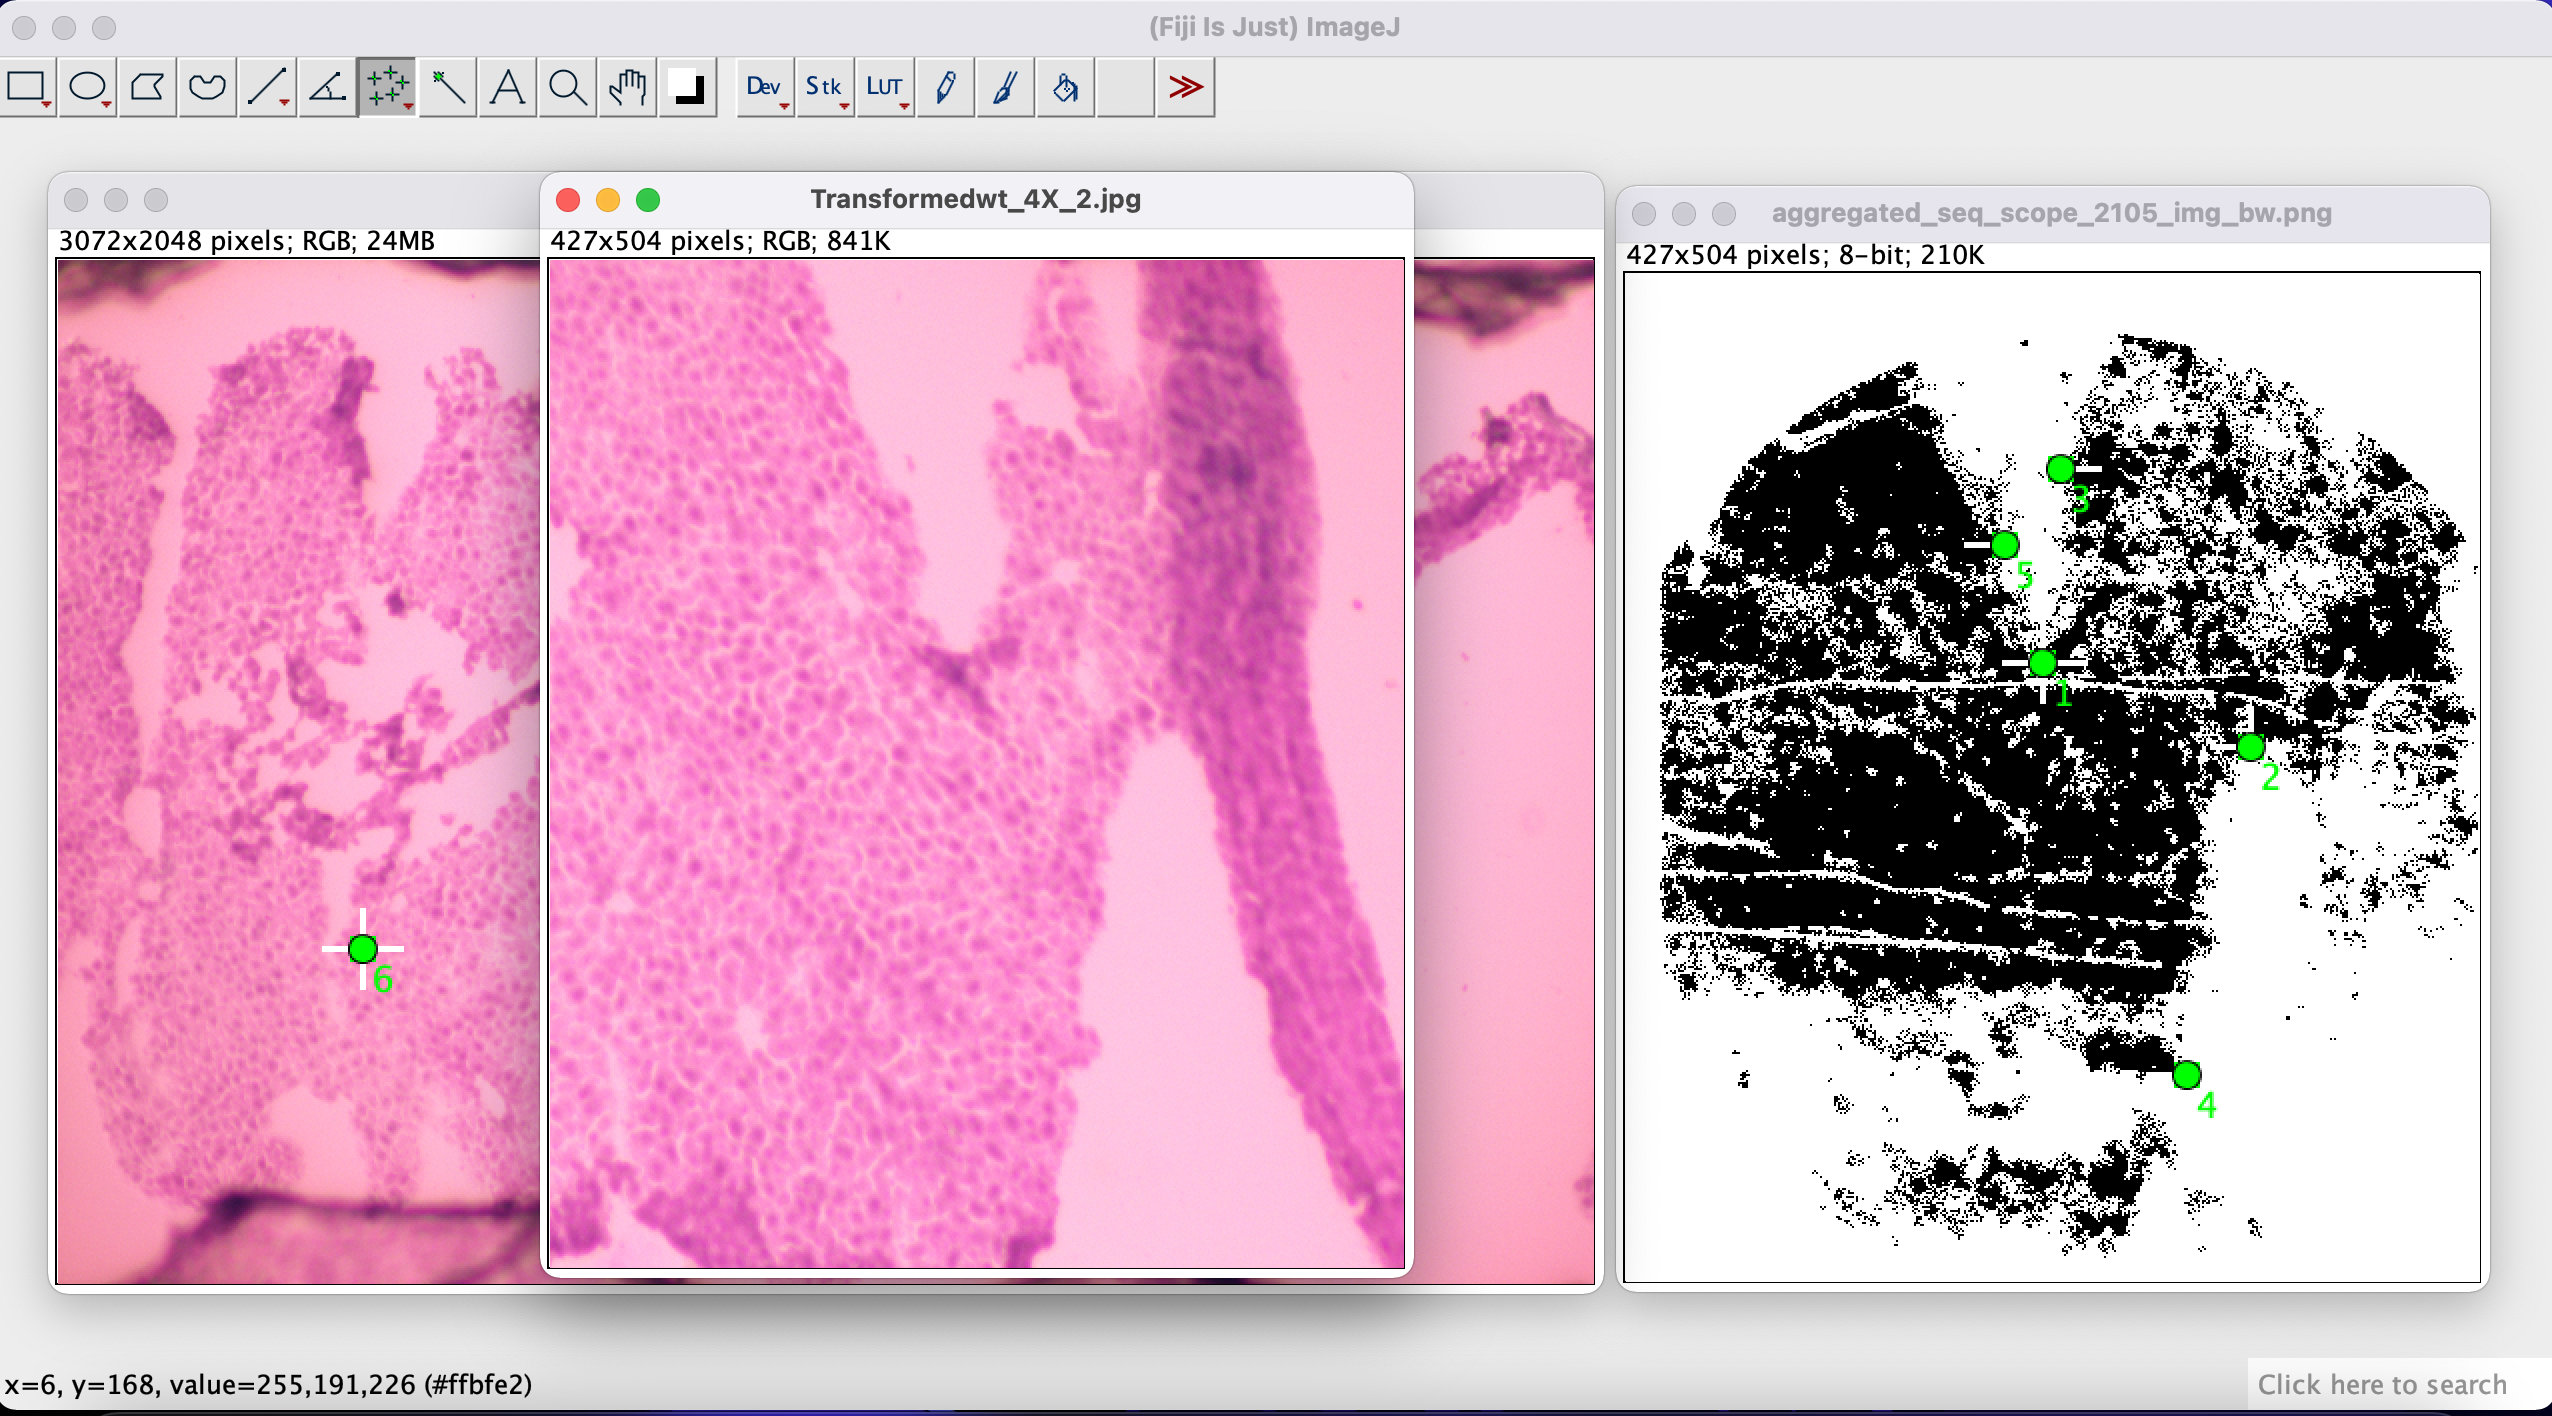
After the transformation we have the two images aligned. We can now save our transformed H&E image (which is aligned with our spatial data).
Step 5 - attach the aligned image
First we load the spacemake processed Seq-scope tile nr 2105 data:
from spacemake.smk import Spacemake

spmk = Spacemake('/path/to/your/spacemake/project')

adata_2105 = spmk.load_processed_adata(
    project_id = 'seq_scope',
    sample_id = 'seq_scope_liver_2105',
    run_mode_name = 'seq_scope',
    umi_cutoff = 300
)
Then we load the previously manually aligned image and attach it to our data:
from spacemake.spatial.he_integration import attach_he_adata
import cv2

matched_he = cv2.imread('./Transformedwt_4X_2.tif')

adata = attach_he_adata(adata_2105.copy(),
                        matched_he,
                        push_by_spot_diameter=False,
                        raw_aligned=True)
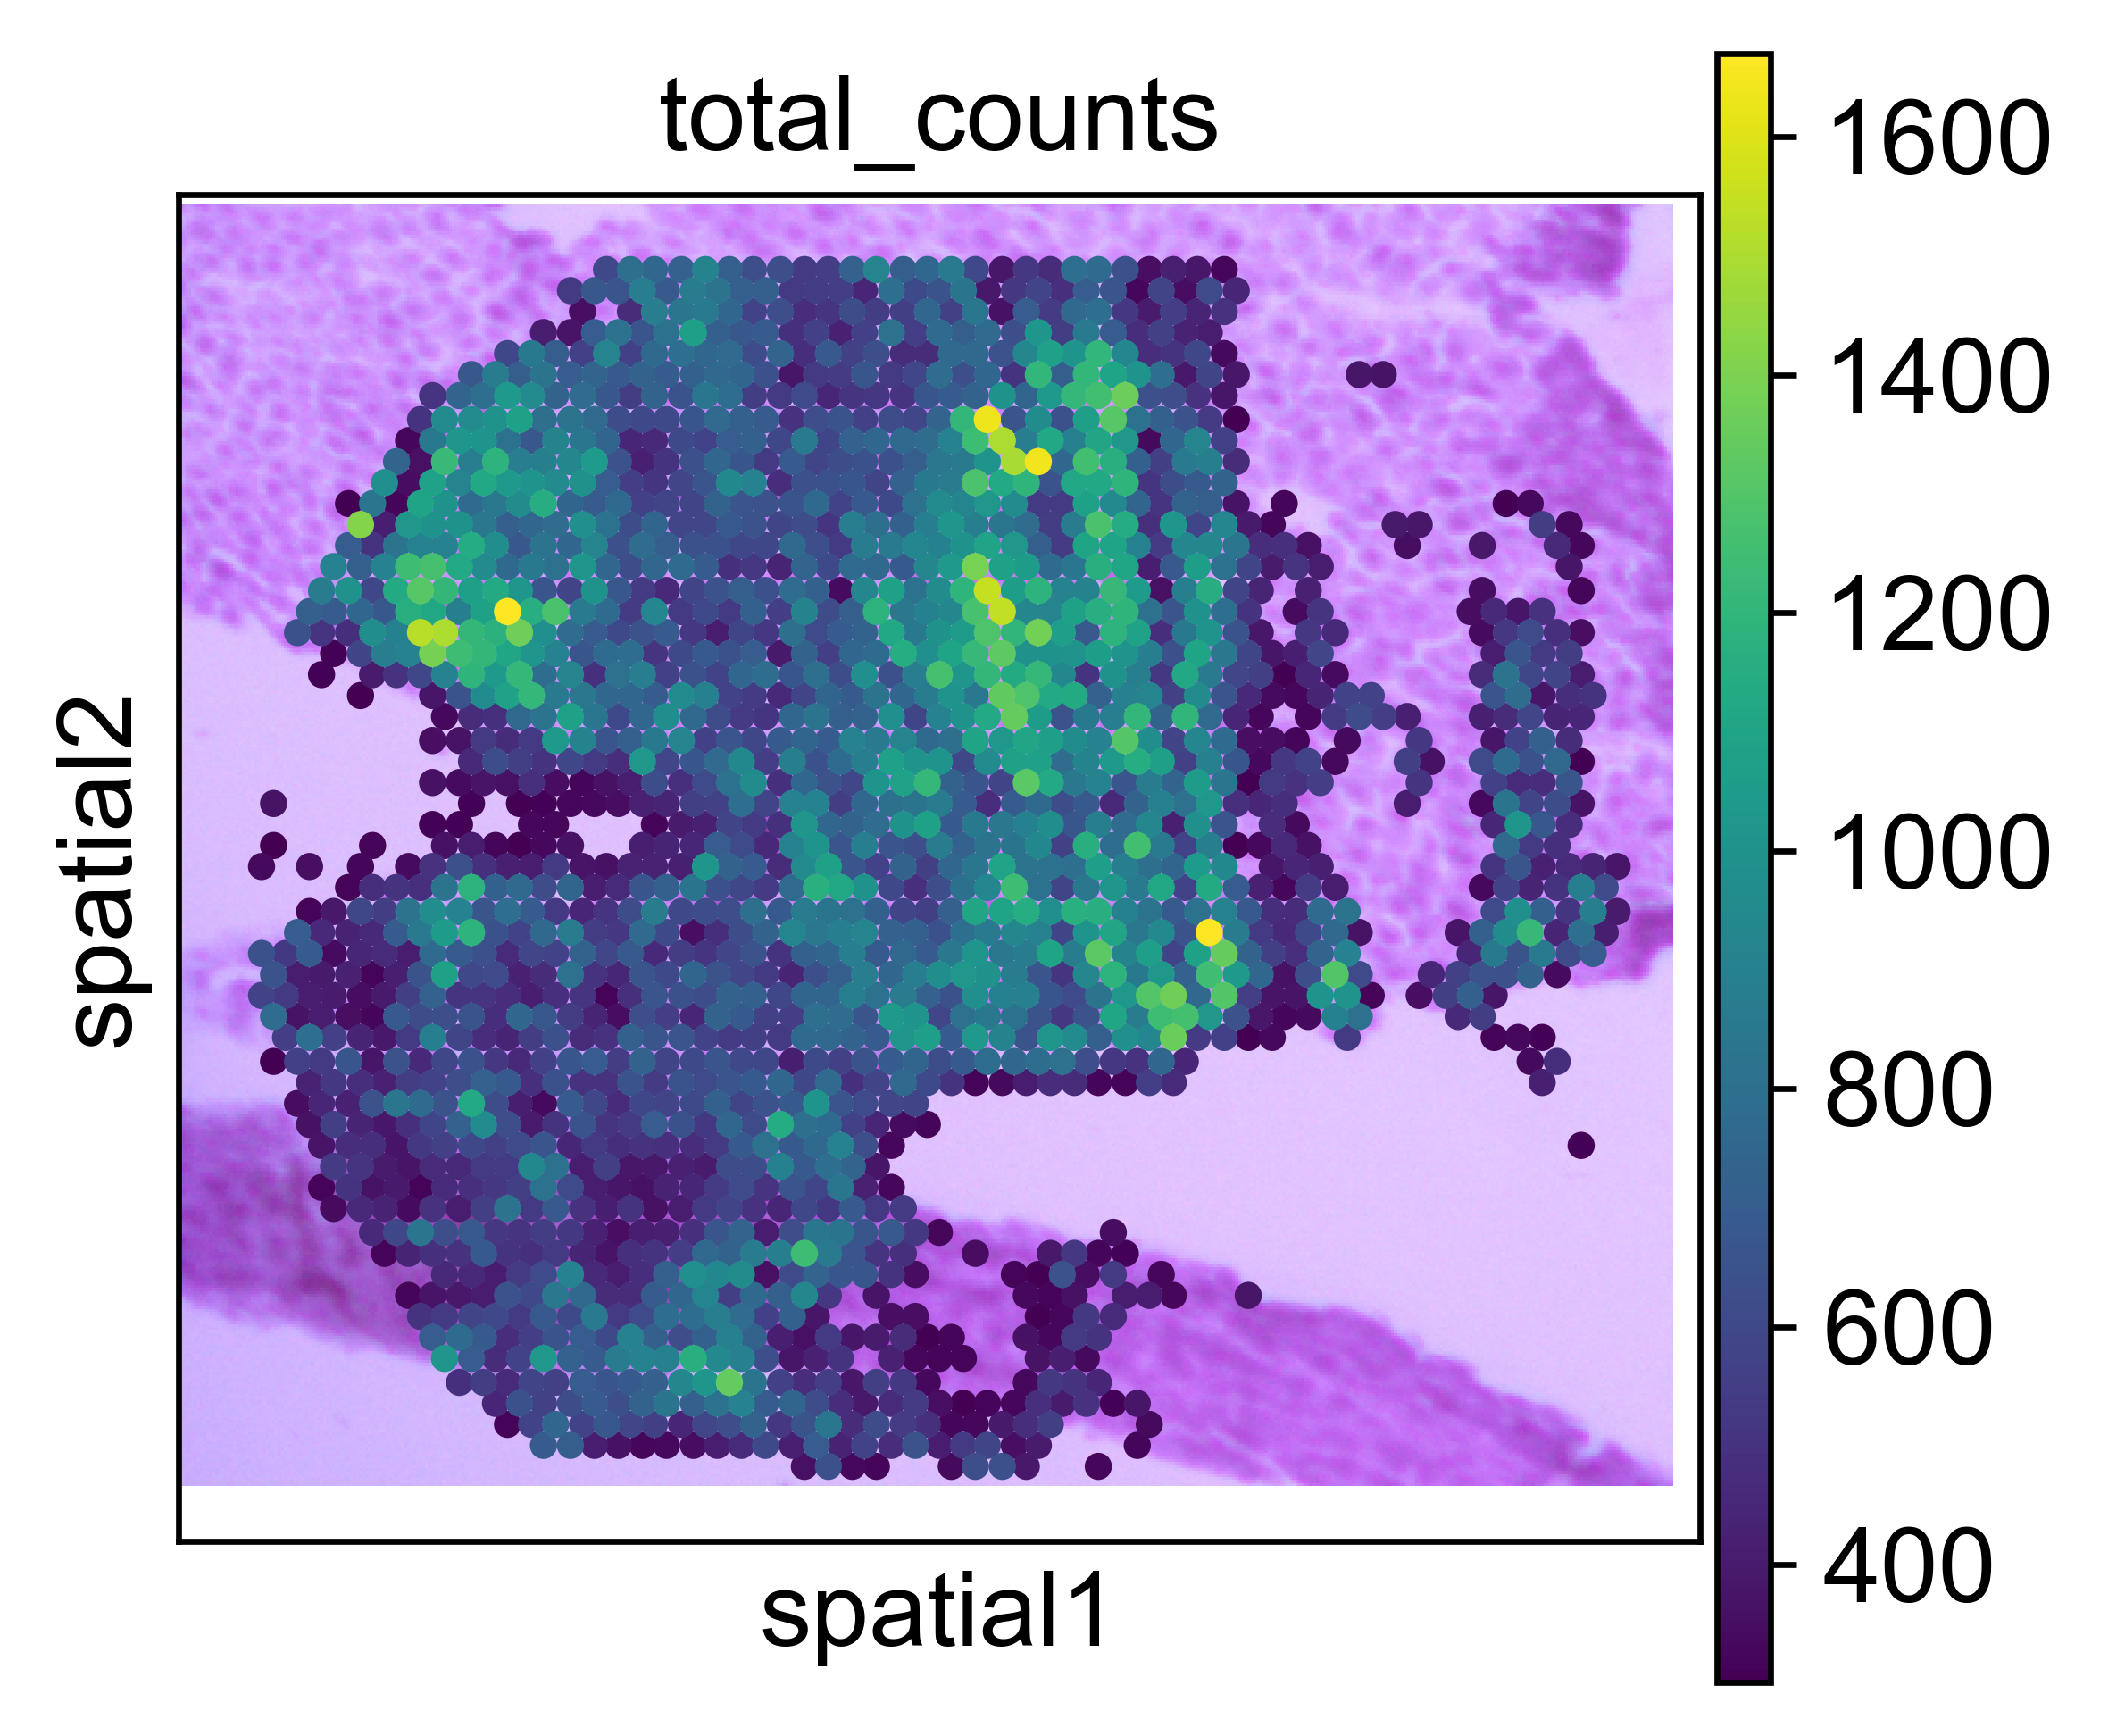
After attachment, we can plot our expression data on top of the aligned H&E with scanpy:
import scanpy as sc

sc.set_figure_params(dpi=300)

sc.pl.spatial(adata, color='total_counts')
Note
As axes in scanpy are flipped with respect to the axes in Fiji, because Fiji reads the image axes in different order.